Some of the very common annotations that we use while developing applications using Spring Framework.
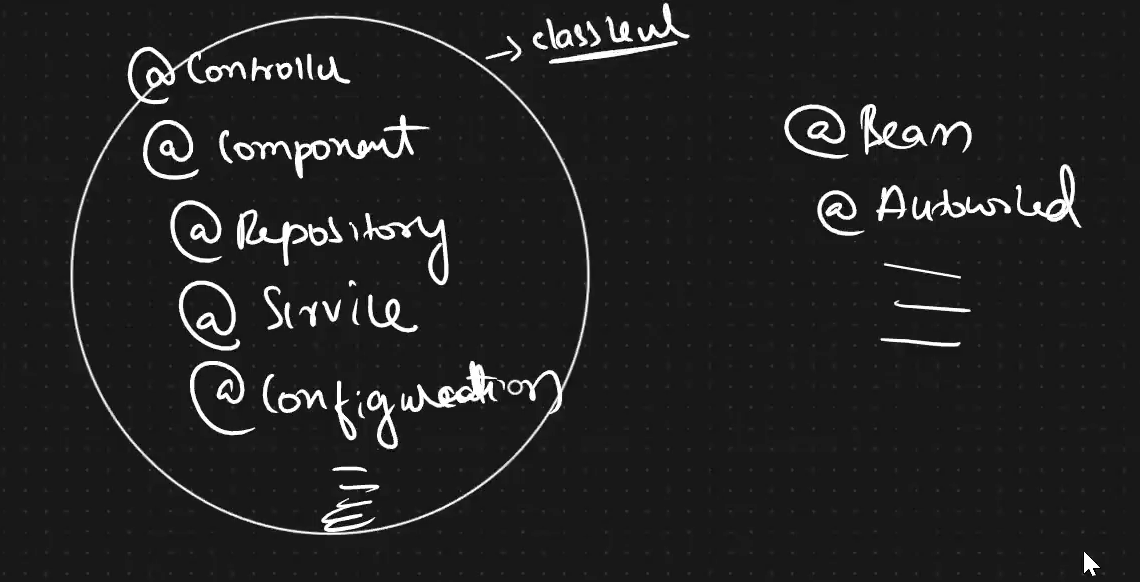
- @Component
- @Controller
- @Repository
- @Service
- @Configuration
- @Bean
- @Autowired
- @Primary
- @Qualifier
Few of the annotations are stereotyped annotations, meaning they get applied on the class level only.
@Component annotation
The @Component annotation is a fundamental annotation in the Spring Framework used to declare a class as a Spring bean.
When you mark a class with @Component, it informs the Spring container to manage the lifecycle of instances of that class, allowing them to be discovered, instantiated, and configured by the container.
import org.springframework.stereotype.Component;

@Component
public class MyComponent {
    // Class implementation goes here
}
In this example:
- The @Component annotation is used to mark the class
MyComponentas a Spring bean. - When the Spring container is scanning for components (beans) in the application, it will discover and register
MyComponentas a bean.
@Component is the base of other stereotype annotations.
There are also more specific stereotypes in Spring, such as @Service, @Repository, and @Controller, which are specialized versions of @Component. These annotations help to indicate the role of the annotated class in the application architecture (e.g., service layer, repository layer, or controller layer).
For example, @Service is a specialization of @Component, and it is often used to annotate service classes in a Spring application.

When using these annotations, it’s important to ensure that component scanning is enabled in your Spring configuration. This allows the Spring container to automatically detect and register beans in your application.
Custom bean name
In Spring Framework, the @Component annotation is used to indicate that a class is a Spring component. By default, Spring creates a bean instance of the annotated class with a bean name generated from the class name, with the first letter lowercased. However, you can specify a custom bean name using the value attribute of the @Component annotation.
@Component("customName")
public class MyComponent {
    // MyComponent class definition
}
In the above example, the MyComponent class is annotated with @Component("customName"), indicating that it is a Spring component with the custom bean name “customName”. When Spring scans the classpath for components during application startup, it creates a bean instance of MyComponent with the specified bean name.
NOTE – Component scanning can be configured in XML or Java-based configuration files.
Example using Annotations
Util.java – class for utility functions.
package com.rndayala.util;
import org.springframework.stereotype.Component;

@Component
public class Util
{
	public Util() {
		System.out.println("Instantiating Util object..");
	}
}

DataModel.java – this class is part of DAO layer for database activity
package com.rndayala.dao;
import org.springframework.stereotype.Repository;

//spring framework internally creates a class reference variable
//by following convention : camelCase notation => dataModel
//to use different object reference name/bean name, specify here
@Repository(value="datarepo")
public class DataModel
{
	public DataModel() {
		System.out.println("Instantiating DataModel object..");
	}
}

BusinessLogic.java – this class is part of Service layer
package com.rndayala.service;
import org.springframework.stereotype.Service;

// spring framework internally creates a class reference variable
// by following convention : camelCase notation => businessLogic
@Service
public class BusinessLogic
{
	public BusinessLogic() {
		System.out.println("Instantiating Service object..");
	}
}
We need to create an applicationcontext.xml file to inform Spring that we are using annotations. Inform Spring framework about component scanning.
<?xml version="1.0" encoding="UTF-8"?>
<beans xmlns="http://www.springframework.org/schema/beans"
       xmlns:xsi="http://www.w3.org/2001/XMLSchema-instance"
       xmlns:context="http://www.springframework.org/schema/context"
       xsi:schemaLocation="http://www.springframework.org/schema/beans
           http://www.springframework.org/schema/beans/spring-beans-3.0.xsd
           http://www.springframework.org/schema/context
           http://www.springframework.org/schema/context/spring-context-3.0.xsd">
     <!-- bean definitions here -->
     <context:annotation-config/>
     <context:component-scan base-package="com.rndayala" />

</beans>
<context:component-scan /> is usually preferred as it combines enabling annotation support with specifying base package(s) for component scanning in a single tag. Otherwise, you can use <context:annotation-config /> to enable annotation support without component scanning.
Test class
LaunchApp.java – main application file to launch the application
package com.rndayala.main;
import org.springframework.context.ApplicationContext;
import org.springframework.context.support.ClassPathXmlApplicationContext;

public class LaunchApp {
	public static void main(String[] args)
	{
		// activating Spring IoC container
		ApplicationContext context =
 new ClassPathXmlApplicationContext("applicationcontext.xml");
	}
}
Output : Instantiating DataModel object..
Instantiating Service object..
Instantiating Util object..
@Autowired annotation
The @Autowired annotation is a feature of the Spring Framework that provides a way to automatically inject dependencies into Spring beans. This annotation can be used to eliminate the need for explicit getters and setters methods for the properties.
- When Spring encounters a bean with the @Autowired annotation, it automatically injects a matching dependency into that bean at runtime.
- @Autowired — The dependency injection can be performed on fields, methods, and constructors.
You can use @Autowired directly on fields:
public class MyClass {
    @Autowired
    private AnotherClass anotherClass;

    // Other members and methods
}
@Autowired can be applied to setter methods:
public class MyClass {
    private AnotherClass anotherClass;

    @Autowired
    public void setAnotherClass(AnotherClass anotherClass) {
        this.anotherClass = anotherClass;
    }

    // Other members and methods
}
The most recommended use of @Autowired is on constructors. This is known as constructor injection:
public class MyClass {
    private AnotherClass anotherClass;

    @Autowired
    public MyClass(AnotherClass anotherClass) {
        this.anotherClass = anotherClass;
    }
}
Constructor injection is often considered a best practice as it ensures that dependencies are injected at the time of object creation, making the object more immutable and ensuring that it is always in a valid state.
The @Autowired annotation has an optional required attribute. When set to true (default), the injection will fail if no matching bean is found. If set to false, the injection will be skipped if no matching bean is found.
@Autowired(required = false)
private AnotherClass anotherClass;
@Qualifier annotation
In Spring Framework, the @Qualifier annotation is used to disambiguate beans when multiple beans of the same type are available for autowiring. It works in conjunction with the @Autowired annotation to specify which bean should be injected.
If there are multiple beans of the same type, you may need to use the @Qualifier annotation along with @Autowired to specify which bean should be injected.
@Autowired
@Qualifier("specificBean")
private AnotherClass anotherClass;
Here, “specificBean” is the name of the target bean.
The @Autowired annotation simplifies the process of dependency injection in the Spring Framework, making the code cleaner and more maintainable.

@Qualifer annotation can be applied to field, setter/method, local variable, but not on constructor.
Using the @Qualifier annotation allows you to be explicit about which bean should be injected when multiple beans of the same type exist in the Spring container. It provides fine-grained control over dependency injection and helps avoid ambiguity in autowiring scenarios.
@Primary annotation
The @Primary annotation in the Spring Framework is used to indicate a primary bean when there are multiple beans of the same type. When a primary bean is defined, it becomes the preferred candidate for autowiring among beans of the same type.
Mark one of the beans of a certain type as the primary bean by adding the @Primary annotation to its class.
@Component
@Primary
public class PrimaryBean implements SomeInterface {
    // Bean implementation
}
Define other beans of the same type without the @Primary annotation.
@Component
public class AnotherBean implements SomeInterface {
    // Bean implementation
}
When autowiring by type (@Autowired), the primary bean is given preference if there are multiple beans of the same type.
@Component
public class MyComponent {
    @Autowired
    private SomeInterface someInterface;

    // Other members and methods
}
In this example, someInterface will be injected with the primary bean (PrimaryBean in this case).
The @Primary annotation simplifies the process of specifying a default or fallback bean when multiple beans of the same type exist in the Spring context. It’s particularly useful in scenarios where there is a need to provide a default implementation or when you want to control the default behavior of autowiring.
@ComponentScan annotation
The @ComponentScan annotation is used in Spring Framework to automatically detect and register Spring-managed components (beans) within a specified package or packages.
It enables Spring to scan the classpath for components and automatically create bean definitions for them, eliminating the need for manual bean definition in XML or Java configuration files.
Spring will automatically detect classes annotated with stereotype annotations such as @Component, @Service, @Repository, @Controller, and others within the specified base package(s). It will create bean definitions for these components based on their annotations.
When Spring finds a class annotated with one of the stereotype annotations within the specified package(s), it creates a bean definition for that class and registers it in the Spring container.
Here’s how the @ComponentScan annotation is typically used:
You typically annotate a configuration class (usually annotated with @Configuration) with @ComponentScan. This class serves as the entry point for configuring Spring beans and other Spring-related configurations.
@Configuration
@ComponentScan(basePackages = "com.example.app")
public class AppConfig {
    // Configuration methods and other bean definitions
}
Use the basePackages attribute of @ComponentScan to specify the base package or packages to scan for components. Spring will recursively scan all subpackages of the specified base package(s) for components to register as beans.
Example
Suppose you have the following classes defined in your Spring application:
HelloServiceinterface:
public interface HelloService {
    String sayHello();
}
HelloServiceImplclass implementingHelloService:
import org.springframework.stereotype.Service;

@Service
public class HelloServiceImpl implements HelloService {
    @Override
    public String sayHello() {
        return "Hello, World!";
    }
}
AppConfigclass where@ComponentScanis used to specify the base package:
import org.springframework.context.annotation.ComponentScan;
import org.springframework.context.annotation.Configuration;

@Configuration
@ComponentScan(basePackages = "com.example.app")
public class AppConfig {
    // Other configuration methods (if any)
}
Test class
import org.springframework.context.ApplicationContext;
import org.springframework.context.annotation.AnnotationConfigApplicationContext;

public class Main {
    public static void main(String[] args) {
        ApplicationContext context = new AnnotationConfigApplicationContext(AppConfig.class);
        HelloService helloService = context.getBean(HelloService.class);
        System.out.println(helloService.sayHello());
    }
}
In this example:
HelloServiceImplis annotated with@Service, which is a specialization of@Component, indicating that it is a Spring-managed component.AppConfigis annotated with@Configurationto indicate that it provides Spring configuration. It also uses@ComponentScanto specify that Spring should scan thecom.example.apppackage and its subpackages for components.- In the
Mainclass, anAnnotationConfigApplicationContextis created withAppConfig.classpassed to its constructor. This loads the Spring application context and triggers component scanning. HelloServicebean is retrieved from the Spring context usinggetBean()method and itssayHello()method is invoked.
With @ComponentScan, Spring automatically detects HelloServiceImpl as a Spring-managed bean because it’s annotated with @Service. There’s no need to explicitly define this bean in an XML configuration or another Java class. This reduces manual configuration and makes the application more maintainable.
Example 2
Configuration class –

Autowiring

Business logic :

Main Class :

Here, if you observe, the return type of the bean method and the field in the class are both same.
@PropertySource annotation
The @PropertySource annotation is used in Spring Framework to specify the properties file or files to be loaded into the Spring Environment. This annotation is typically used in conjunction with the @Configuration annotation to load external property files into the Spring application context.
First, create one or more property files containing key-value pairs. These files can be in either .properties or .yml format.
For example, let’s say you have a application.properties file:
app.name=MyApp
app.version=1.0.0
Next, use the @PropertySource annotation in your Spring configuration class to specify the location of the property file(s). You can specify multiple locations if needed.
import org.springframework.context.annotation.Configuration;
import org.springframework.context.annotation.PropertySource;

@Configuration
@PropertySource("classpath:application.properties")
public class AppConfig {
    // Configuration methods and other bean definitions
}
In the example above, @PropertySource("classpath:application.properties") specifies that the properties defined in application.properties should be loaded into the Spring Environment.
Once the properties are loaded into the Spring Environment, you can access them in your Spring beans using the @Value annotation or by programmatically accessing the Environment object.
import org.springframework.beans.factory.annotation.Value;
import org.springframework.stereotype.Component;

@Component
@PropertySource("classpath:application.properties")
public class MyComponent {
    @Value("${app.name}")
    private String appName;

    @Value("${app.version}")
    private String appVersion;

    // Other methods
}
In this example, ${app.name} and ${app.version} are placeholders that will be replaced with the values from the property file.
NOTE – You can specify multiple property files by providing an array of strings to @PropertySource.
@Configuration
@PropertySource({"classpath:application.properties", "classpath:other.properties"})
public class AppConfig {
    // Configuration methods and other bean definitions
}
- This allows you to load properties from multiple files into the Spring Environment.
By using @PropertySource, you can externalize configuration properties from your Spring application code, making it easier to configure and maintain your application across different environments.
Example
Creating a normal file, called profile – application.properties file under com.telusko.commons package.
We can keep environment dependencies here, like, url, username, password, etc.

@PropertySource annotation

Now developing on business logic :

Run the project:
